Git Installation
For Linux
Linux users generally have it easiest, as it can usually be installed via your package manager. If you're using Linux, you most likely have experience using the command line, so simply run one of the following commands to install Git, depending on your distribution:
| Distribution(s) | Command |
|---|---|
| Debian / Ubuntu / Linux Mint / Kali / Pop!_OS | sudo apt install git |
| Fedora / RHEL / CentOS / Rocky Linux / AlmaLinux | sudo dnf install git |
| Arch Linux / Manjaro / EndeavourOS | sudo pacman -S git |
| openSUSE | sudo zypper install git |
For macOS
On macOS, you must install the Xcode developer toolchain, which will install a version of Git. You can trigger this by simply trying to run git for the first time.
- Open the
Terminalapp. - Type
git --version. If it prints out a version number, then you already have git installed and can continue to Post-Install Setup. - A prompt will appear asking you to install Xcode.
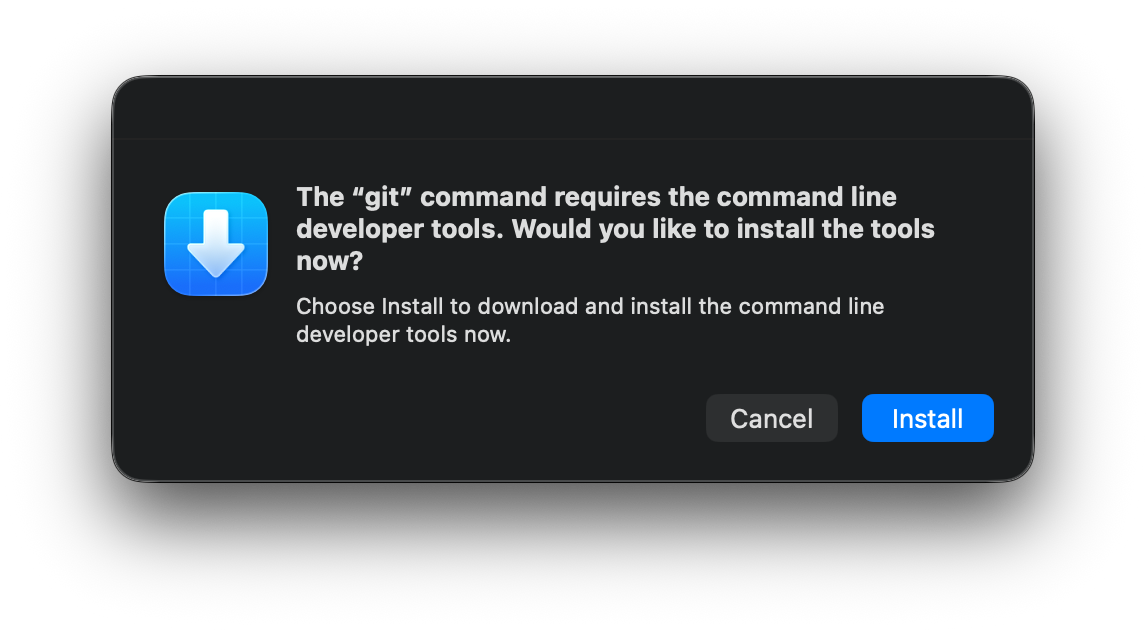
Press Install. - Once installation completes, restart VSCode.
For Windows
Unlike the other operating systems, Microsoft does not have an official Git installation method. Instead, most developers use Git for Windows, which is a standalone Git client that can be installed on any Windows machine.
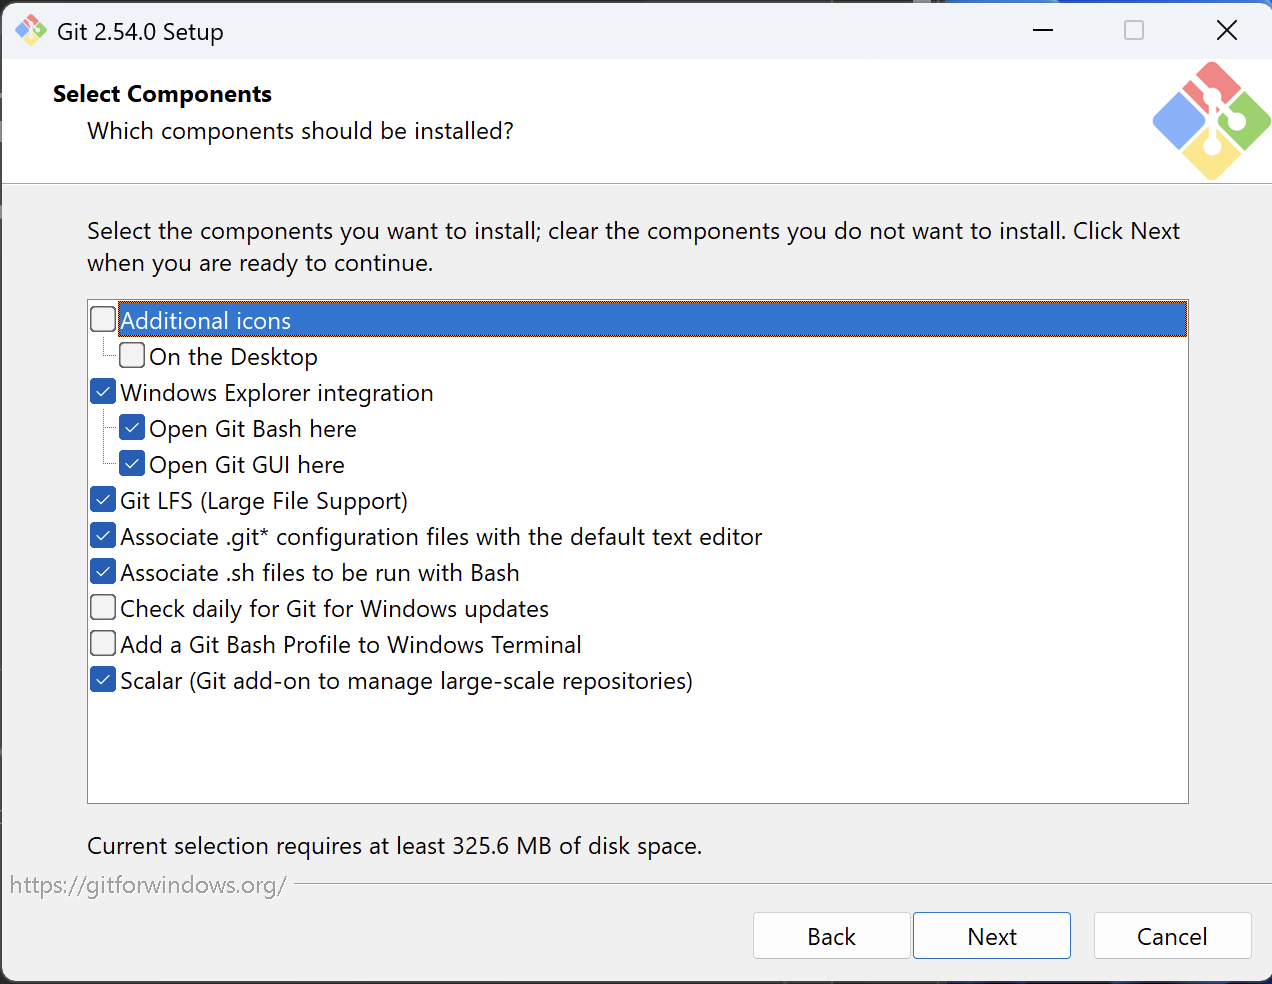
- Download and install Git for Windows from the link above. Make sure to pick the
Standalone Installeroption, as the portable option may not integrate with others tools as easily. - Skip forward in the installer until you reach the below screen. Default options are fine for all of these fields.
Press Install. - Skip forward again until you are given the option to choose the default editor for Git, which you should set to VSCode.
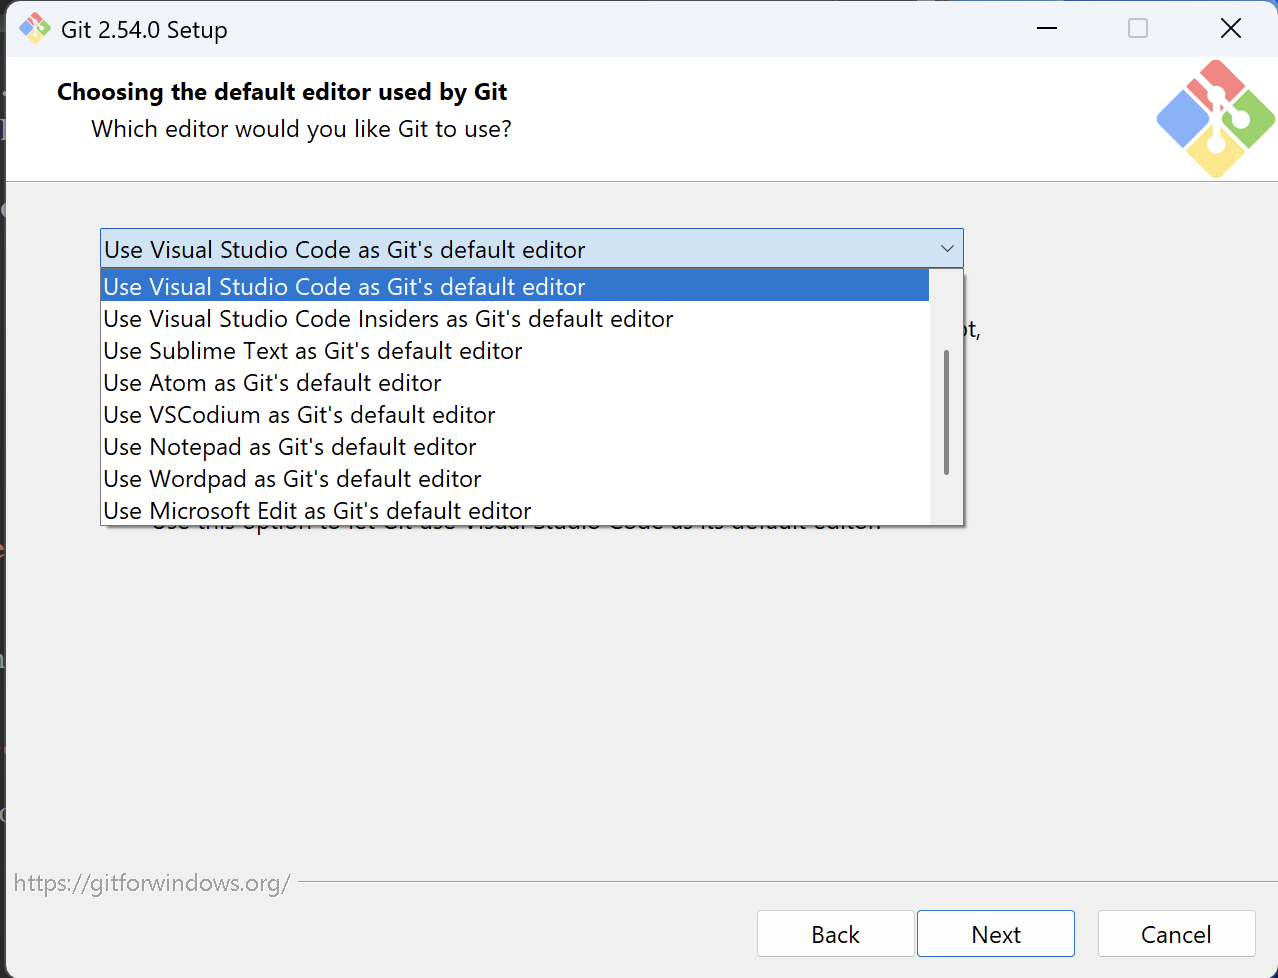
Set to Use Visual Studio Code. If unsure, make sure you are not using Visual Studio Code Insiders at this step, as that is a different application. - Skip forward until you can change the initial branch name. I recommend changing this to
main, asmasteris generally considered dated and is not commonly used anymore.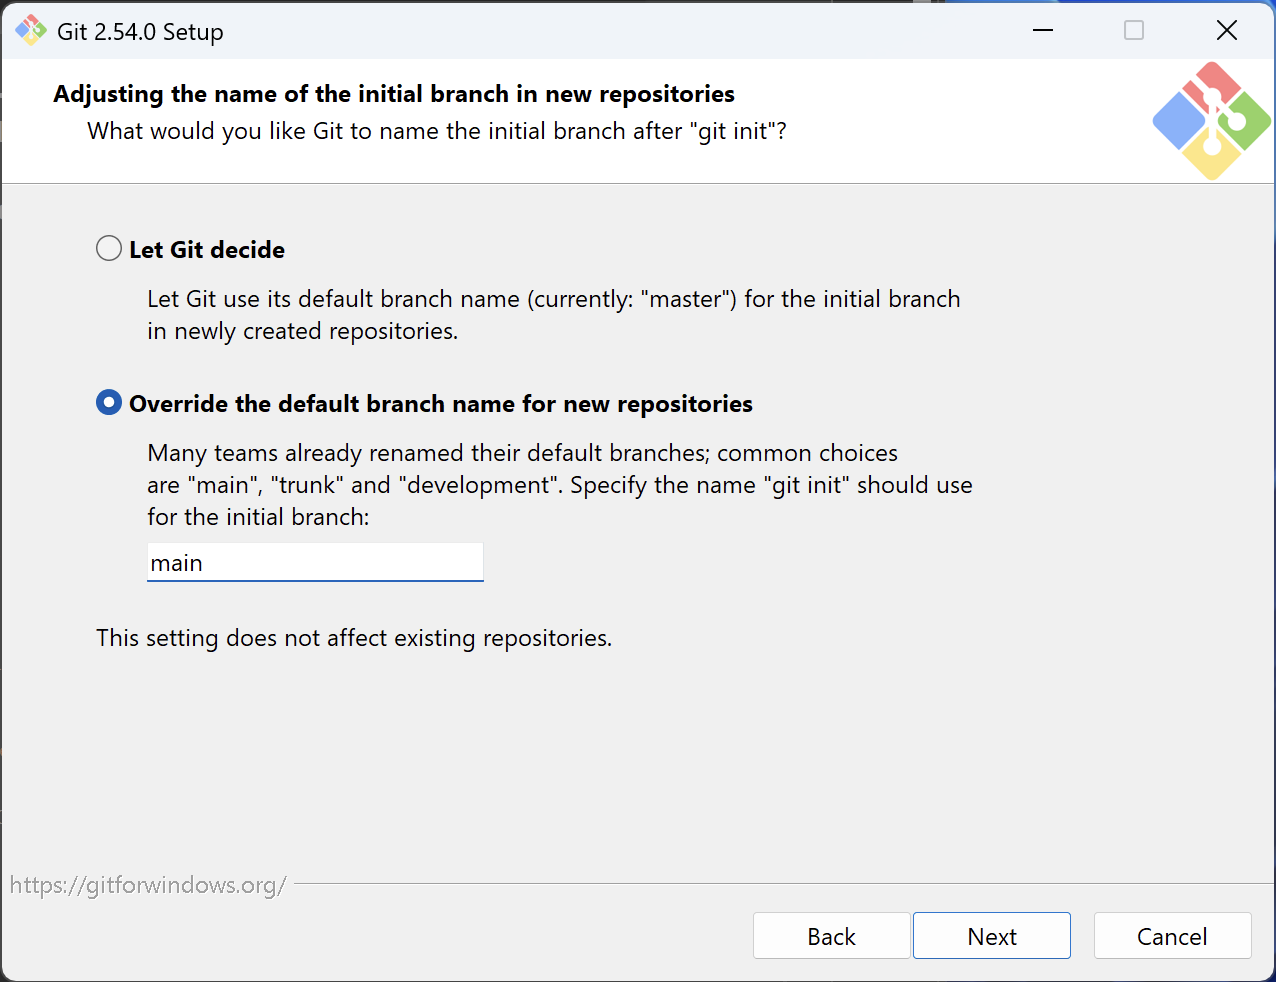
Set to 'main' as the initial branch name. - Skip forward to the end of the installer; the rest of the default options are fine.
Post-Install Setup
Once Git is installed, you still need to do a small bit of setup. Most notably, you need to set a username and email. Open your Terminal on macOS/Linux, or Git Bash on Windows (which was installed with Git), and run the following commands:
git config --global user.name "(your name)"git config --global user.email "(your email)"
(your name) and (your email) parts with a username (or real name), and an email address you have access to.